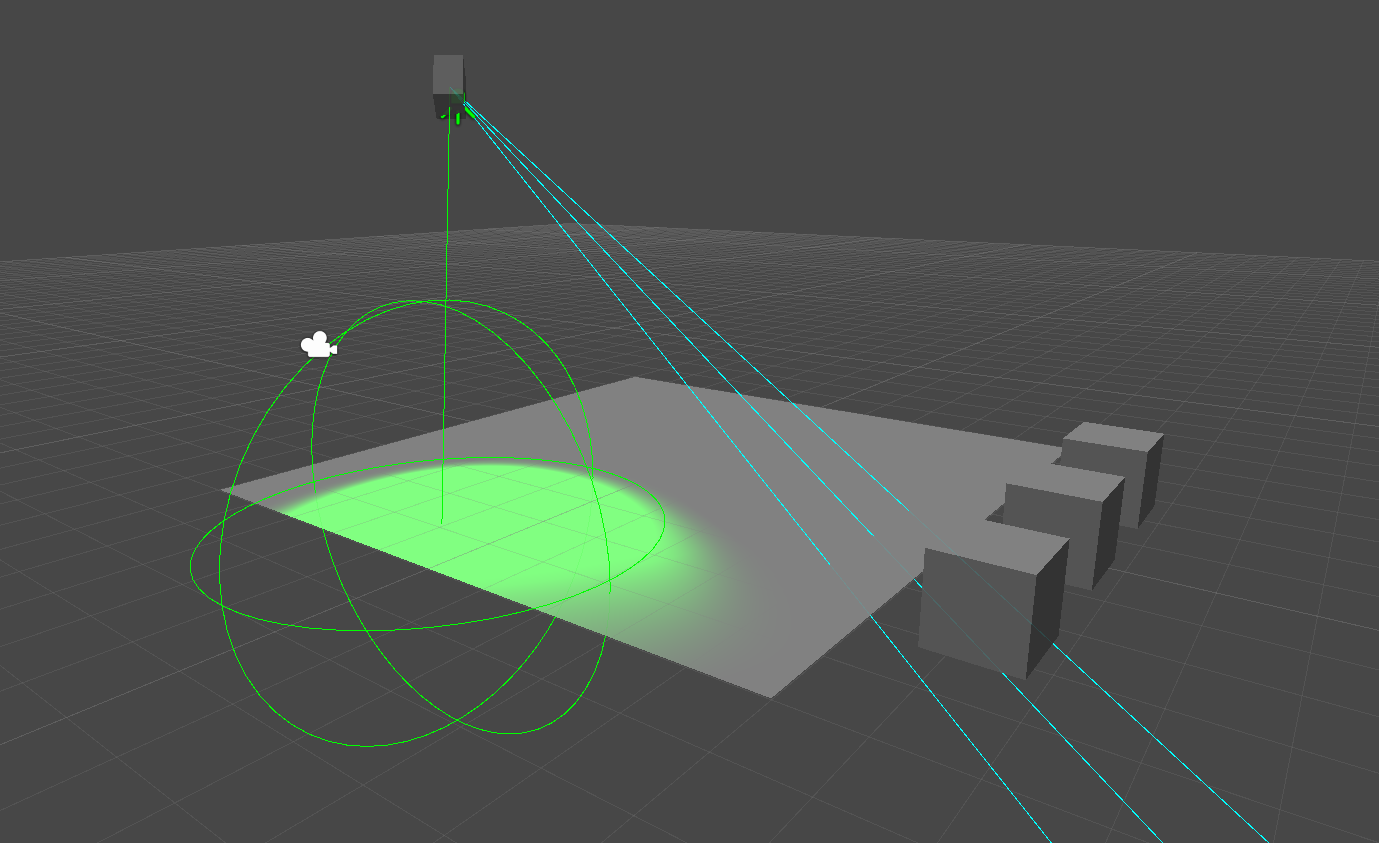
Hello everyone, for the time freeze prototype I decided to implement a detection camera that will potentially be used for Empyreum: Ascension. I decided that it would be a great idea to share the way I did it since I felt like there were not many sources on the topic on the web. I will show you how it was put together but first I will talk briefly about the three scripts I coded. Click on the name of each script to be directed to the script in github.
When no Targets are detected, camera light is green and follows its routine. When a target is WithinRange but not detected, camera light is green but detection sphere is yellow (if active). When a target is detected, camera light is red and it follows the target until it has gone out of range!
Scripts
The first thing for me was to implement a Detection State script which will contain all possible states of the camera. The ones I included are: Not Detected, Alerted, Detected, Within Range, but you can add more!
Sine Wave Rotation
Like you might already know, security cameras in games often rotate back and forth. To accomplish that same rotation I used the sine wave formula, and added a set speed and angle for the camera to rotate on its Y axis.
Camera Detection
Last but not least is the camera detection script. This scripts takes an instance of Detection State and the Sine Wave Rotation. Detection States are changed depending on whether the player is detected, undetected or within a radius of detection. When the player is detected, the Sine Wave Rotation script is deactivated and the camera follows the player until they have gone out of range.
Putting it Together
1. Create the three C# scripts: DetectionState, IsolateRotation and IsDetectionCamera. Place the respective code into each script from Github.
2. Create a Cube, name it “camera” and scale it accordingly.
3. Create a Spotlight and parent it to “camera.” Set its X rotation to zero and move it towards the front of the camera.
4. Rotate Camera 45 degrees and elevate it so that it looks like its observing the area.
5. Attach Detection State, IsolateRotation and IsDetectionCamera to the camera gameObject.
6. Drag DetectionState to the “state” field and Spotlight to “Camera Light” field in IsDetectionCamera. These are important! Otherwise camera will not work!
7. Create 3 cubes and name them. target1, target2, target3.
8. Add the names of the cubes into the Targets list in IsDetectionCamera
9. Create a new Cube and call it Cover. Place it at 0,0,0. Make sure that the cover blocks the cubes!!
10. You might want to change the spotlight settings so that the light is brighter and the spot angle so it fits the sphere.
11. Run and have fun changing the values and adding it to your own project! 😀
Notes
The sphere and the line from the camera show you the radius of detection and range of view of the camera. The 3 cyan lines is basically a raycast from each target to to camera! You can switch this off by unchecking the DrawGizmos toggle under IsDetectionCamera.
ScreenShots


CLICK HERE TO ACCESS TO THIS PROJECT IN GITHUB
And that’s all for now!! I home you guys find this tutorial useful! Until next time


0 thoughts on “Unity Tutorial: Implementing A Detection Camera”